Thursday, June 29, 2017

Washer/Dryer Platform

I am so super happy this week!  I just got the new washer and dryer I bought about a month ago.  They arrived yesterday and are HUMONGOUS!  They are also space age looking, like maybe they belong on the Enterprise.  And... they sing me a little song when they are done doing their jobs.  So, I love my new washer and dryer.  But because they are soooo big,  they don't fit on my old 2X4 and plywood platform.  I didn't want to just get rid of the platform and take my chances with my beautiful new machines sitting on the floor in our basement.  It hasn't flooded in there since we got new gutters and routed out our main line, but still.  So I needed to add on to the existing platform with more 2X4s and plywood.    I only needed to add on about 10 inches to the front of the platform so I made a little base out of 2X4s with my Kreg Jig.


Then I cut a piece of particle board we had lying around from our floor redo (which I haven't posted on here because I don't have any good after photos of the floor yet) and screwed it on top.


Now my platform is even less attractive than it was previously because the two types of plywood don't match.  So I bought some contact paper and covered the whole thing with zig zags!


It did get a little ripped when the appliance installers put the machines in, but I had enough contact paper to just cover up the tears.  It doesn't look excellent, but it does look better than that awful particle board!  And really, who's looking at the base with those beautiful big machines sitting on top?  I never thought I would be so excited by appliances!


Wednesday, May 24, 2017

Extra Room on the Bookshelf

Last week I decided to make some room on my bookshelves for something other than books.  Mom was talking about discreet storage for kids toys on the main level (something that we don't currently  have).  I took three boxes of books to Half Price Books and came away with $25.  I mostly got rid of children's books that were too young for my kids and cook books.  I also got rid of all the prequels to the Dune series because I'm pretty sure that everyone agrees that those books are terrible.  I then had a couple of empty spots on my bookshelves to place some toy storage.  Here's what I ended up with.


So far I've only made one basket, but as soon as my next Joann Fabrics coupon is valid I'll grab some more fabric to make a second one.  Then one can be for Sofia and the other for Henry.  If you also want some reasonably priced storage go to filminthefridge.com to get the tutorial.  The size for the larger basket perfectly fit the space on my bookshelf.  I bought the pink triangle fabric and used some burlap I had in the house from my sister-in-law's Harry Potter themed birthday party.  I cut my house elf costume up and had a nice burlap lining for the basket!  I'm glad I didn't end up buying an overpriced basket online and sacrificing size and style.  This way I got exactly what I wanted and it looks great!

Wednesday, May 3, 2017

Party Favors for Sofia's 7th Birthday

Sofi Sue is about to turn 7 and we're holding her party this weekend.  I hate spending money on party favors that I know will just be thrown out within the month.  So, instead, I made some.  I had almost all of the supplies on hand.  I had to buy the security eyes, but with a coupon I think they ended up costing about $6.  I made 24 favors, so it ended up being 40 cents a favor.  That's what I like to spend!


Of course, I can't figure out how to rotate this picture!  These were quick and easy to crochet.  If you want to make some of your own, here's the link: https://www.craftsy.com/crocheting/patterns/purple-stitch-project-monster-amigurumi/118587 


Thursday, April 20, 2017

Preliminary Garden Work

This year I decided to try and start my seeds indoors again.  Last year I direct sowed after the last frost outside, but I'm hoping to actually get a pumpkin this year, and maybe even a watermelon, so I've started early inside.  I tried a new method where I laid the seeds on labeled paper towels and kept them damp for about a week.


I waited a while, but only a couple of types of seeds started sprouting.  I think that part of the problem is that the paper towels would dry out overnight.  So, I planted them in the used pots I got free on Craigslist and they started to grow like crazy.  I am waiting for three pots that aren't showing any progress, but everything else at least has sprouts.


Also, my little apple tree (which I still need to espalier) has a few blooms on it!


So stinking cute!

Wednesday, April 12, 2017

Braided Rag Baskets

I wanted to give Sofia a bit more storage for all of her little things.  As usual, I wanted to do it for as little money as possible, and I think free fit the bill!  I used old t-shirts from my rag bin to make these cute little braided rag baskets!


First I cut the t-shirts into long strips.


I balled them up and braided them together.


I then used my sewing machine to sew the braid first into a disc shape using a zig-zag stitch.


Then I sewed the braid into walls for the basket.


After the basket was done I used some extra braid and some felt to make the basket into a little animal.


If you'd like a better explanation, check out these two tutorials that I mashed into one rag rug basket:

Moda Bake Shop Braided Rag Rug Tutorial

We All Sew Coiled Rope Basket Tutorial

My little baskets may be a bit lopsided, but I'm happy with the results!

Monday, March 27, 2017

Spring Cleaning

What a mess!  We just got back from Disney World and I'm able to see my house through fresh, haven't been home in over a week, eyes.  And it is disgusting!  I spent the week leading up to our trip making our cute match-y shirts for Disney, packing and preparing.  And previous to that I was my usual messy self.  So, as upsetting as these pictures will be to my mom, here is what my house looks like currently:


Pretty awful, right?  So this week while the kids are off of school and we have absolutely nothing going on, I'm going to attack the mess.  The weather is semi-warm, the windows can be opened, and I've got that cleaning itch that comes around very rarely.  These terrible pictures, out there on the internet for everyone to see, are my way of shaming myself into action.  Hopefully, by next week, most of these rooms will be in much better shape!

Thursday, March 16, 2017

Easy T-Shirt Stencils

Our family is going to Disney World for spring break and we're going to be that family.  The one with the matching shirts.  I know, it's bad, but there were several non-obnoxious factors that went into this decision.  1-Ease of finding one another in a crowd. 2-Cheap shirts means that I don't feel bad about writing Tim's phone number on them in permanent marker. 3-Cheap shirts!  4-We now already have Disney shirts so I don't have to hear any requests to purchase Disney shirts for a million dollars at the park.  So here's how I made them.

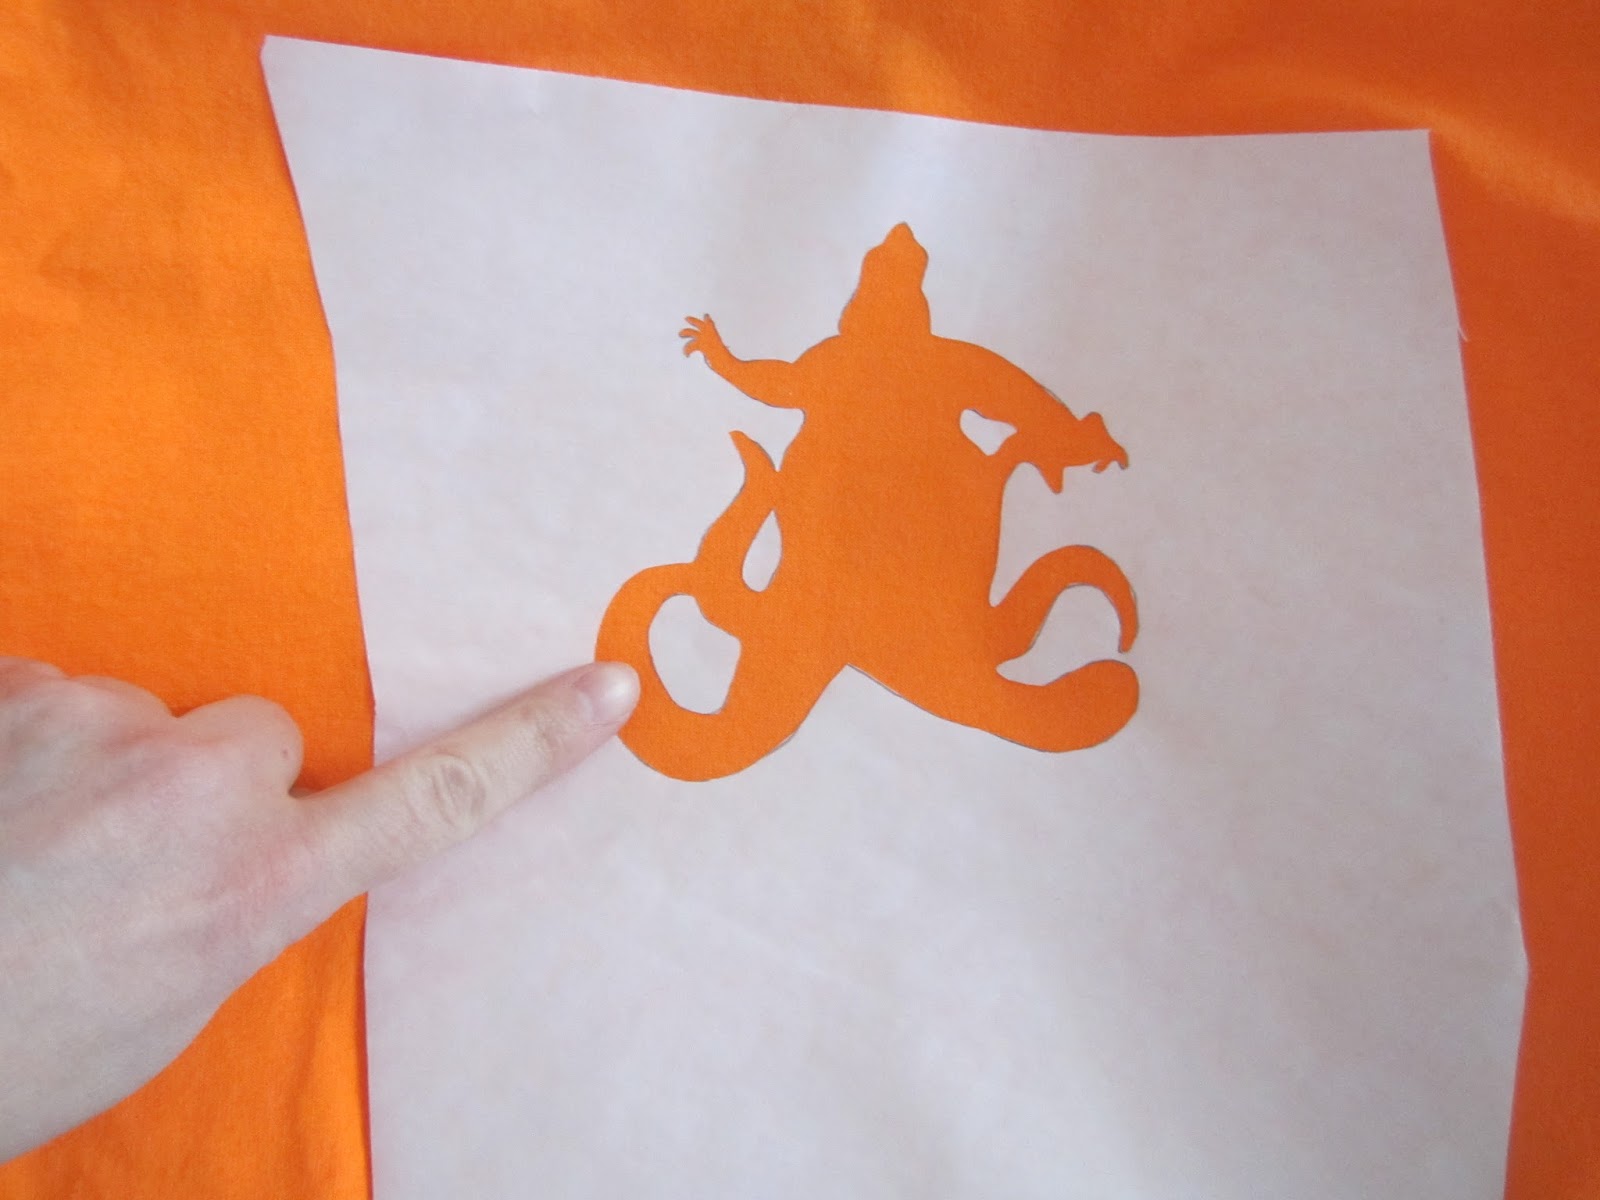
First I printed out (I know, archaic) a coupon for Michael's.  Turns out I didn't need the coupon as their shirts were on sale for $2 a piece.  We are planning on hitting three parks so I bought shirts for the four of us in three different colors.  I then allowed each of the kids to choose a Disney movie to theme the shirts with.  Henry chose Big Hero 6, Sofia chose Frozen and I chose The Little Mermaid.  I then found silhouettes of the characters from each movie and printed them out and taped them to the window with freezer paper in front and traced them with a pencil.


After that I used an x-acto knife to cut the stencil out.


I then ironed the shiny side of the freezer paper onto the shirts.


Some of the shirts had detail work, so I ironed the smaller pieces of freezer paper inside the stencil after ironing the main part on.


I then used little foam stampers to fill in the stencil with fabric paint.


After letting it dry a little while I applied a second coat of paint.  You can't see it here, but when I held the shirt up you could see light coming through the areas that didn't have a thick enough coat of paint.  Then I just peeled the stencils off and let the shirts dry fully.


I did this whole thing assembly line style, so I cut out all the stencils at once, then ironed them all on at the same time and then painted them all simultaneously.  Here is the final product:


The pictures weren't perfect, there did end up being a bit of bleeding under the stencils.


But it's good enough for me!  I'm looking forward to being that goofy matching family at Disney!