Friday, October 28, 2016

DIY Ash Ketchum and Pikachu Halloween Costumes

Each year I tell myself that maybe this is the year I am going to buy my children's Halloween costumes.  But every year I make them anyway.  It is because of a combination of frugality, enjoyment and pride.  This year the frugality ended up not working out so well.  After buying the fabric to make Sofi Sue's Pikachu costume I realized that I had spent only $4 less than the costume I had found online cost.  But, even so I was happy to make the costume and in the end am pretty proud of the end product!


For Sofia's costume I used the tutorial at Talking Trash and Wasting Time to make this costume and found it to be fairly easy to follow despite never having made a onesie costume before.  Of course, now that she has this giant fleecy costume to wear it is supposed to be in the 60s-70s on Halloween!


Henry wanted to be Ash and in order to make his costume I bought a blue shirt from Goodwill and pulled it apart to make it look like Ash's shirt.  I basically just had a picture of Ash on the computer and continued to reference it while making the costume.  I pulled off the collar and used that as a template for making a larger white collar.  I pulled off the long sleeves and used those also as a template, sewed the hem straight, and sewed the button plackets inward.  I also bought Henry an Ash Ketchum hat a couple of months ago, knowing what his costume was going to be.  I don't count this as part of the costume cost because I know that he will continue to wear the hat after Halloween is over.  The hardest part of the costume was trying to find a pair of jeans that I knew existed somewhere in my house (Henry has refused to wear jeans for several years now).  But, we found everything and Henry seems happy enough with the results.  

Tuesday, October 25, 2016

Making a Laundry Room Counter

In our laundry room I had no storage for laundry stuff.  My laundry detergent sat on top of the dryer, along with lint traps and stuff I pull out of pockets before washing clothes.  I thought it would be nice if I had a counter for folding laundry and some storage underneath.  So many many months ago I bought some 2X4s and 2X6s.  I wanted to use Ana White's Country Desk as a jumping off point for making the shelves:

Country Desk from AnaWhite.com

But I wanted to have some shelving underneath so I added a third support underneath.  First I cut all of my wood to length.  Then I glued and clamped the wood together to make the shelves and countertop.


Next I used my kreg jig to put together the three supports for the shelves.  I took pictures of this process, but I started the entire thing so many months ago that I have now lost those pictures.  But here is what the three supports looked like when I was finished making them.


Then I painted them a purple that I got in a sample size when the Sherwin Williams store opened near me.  They had sample pots for half off and their sample size is crazy big, so I had plenty of paint to cover twenty supports, let alone three.


Here they are after one coat, I put a second coat on the same day and plan to put a third coat on soon.  But before putting on the last coat I decided to put the whole thing together.  That way I wouldn't have to paint the parts that were covered by shelving and wouldn't be seen.  So I brought everything into the laundry room and once again used my kreg jig to attach the shelves onto the supports.


You'll notice the white pipe behind the shelf on the left.  That is part of our radon mitigation system.  I had to design my shelving around the pipes back here.  I also made them so that the whole thing could just slide out if we need someone to service the radon mitigation system or get to the area behind the washer and dryer.


The whole thing looks a lot larger than I had thought it would when I first started.  I still need to paint it one more time and add some curtains to the front to cover up the shelves.  I'll make sure to show you the finished product once it is done and in use!

Wednesday, October 19, 2016

Scraping a Popcorn Ceiling

I've finally cleared everything out of Sofi Sue's room-to-be.


Now it's time to deal with that awful popcorn ceiling.  It is ugly and sharp and I'm worried that if Sofi isn't careful she'll scrape herself on it once her loft is built.  I sprayed water on the ceiling and let it sit for a couple of minutes.  Then I tried scraping it off.  It hadn't turned mushy and came off kind of powdery.  So I sprayed it again and let it sit for 15 minutes.  Same results.  I decided that I must have let it sit too long and it got dry, so I sprayed it a third time and let it sit for 10 minutes.  Still dry and powdery.  It comes off a bit, but the tutorials I looked up online all show it coming off in big wet glops.  Mine is flaking off and leaving quite a bit of texture on the ceiling.  It's not spiky any more, but it is certainly still textured.

Before Scraping

After Scraping

It's certainly making a big mess in the room.  The two options I'm considering now are to leave it textured but not dangerously spiky and just paint it as is or to buy something to smear across the ceiling to try and cover up the texture.  I'm leaning towards option two because I hate the look of the ceiling, even though it will end up taking a lot more time and effort.  But at least I'm finally on my way towards getting Sofia's room together!

Tuesday, October 18, 2016

Molting Chicken


Poor Twinkie, not only is she on the bottom of the pecking order she is now also molting.  She doesn't look straggly and sad yet, but there are clouds of black and white striped feathers littering the run.


I don't think this is going to improve her standing with the other ladies!

Thursday, October 13, 2016

Sofia's Rocket

Sofia decided to use a box we had laying around the house to make a rocket.  Here's the end result:


She's especially happy with the flames coming out of the back.

Thursday, October 6, 2016

Completed Bookshelves!

A bit messy, I'll work on it!

So the bookshelves are done!  I spent the afternoon yesterday carrying boxes up from the basement and unpacking books; some of which I haven't seen in about seven and a half years!  I was hoping to have some space to display a couple of knickknacks and have the books artfully arranged.  But there isn't any room!  We still have a couple of shelves that are not stuffed full, and there is even one shelf that is completely empty!  See that one, up in the right hand corner?  Yup, that's the space I have to display cute things.  I guess that's not what my house is going to be.  The house is just not big enough for cute.  Most of the things I've worked on for the house so far have been utilitarian.  Fixing things that need to be fixed, creating storage.  With a small house I think it's a good idea to make everything useful, and then if it is also attractive that's a bonus!  Even though there isn't any space for kitschy thingamajigs, I still think the bookshelves look killer.  And, now we have books!

See the entire process:

Too Many Yellows!
Filling the Gap
Filling the Gap, Part 2
Now I Can Paint! Oh Wait, Maybe Not.
Scary Yellow Primer
A Yellow Paint That Doesn't Blind Me!
Finally, Starting the Bookshelves!
Awesome Bookshelves, Slow Going.
Baby Steps
Filling in the Knotholes
Hey Dad, I've Got Our Project Ready!
So I've Been a Little Lazy
Getting Close to Being Done!
Filling More Gaps
I'm in a Yellow State of Mind

Did I really write 16 posts on one little project!  You bet!  And it was evidently an exciting one, look at all those exclamation points!

Tuesday, October 4, 2016

More Tim's Birthday

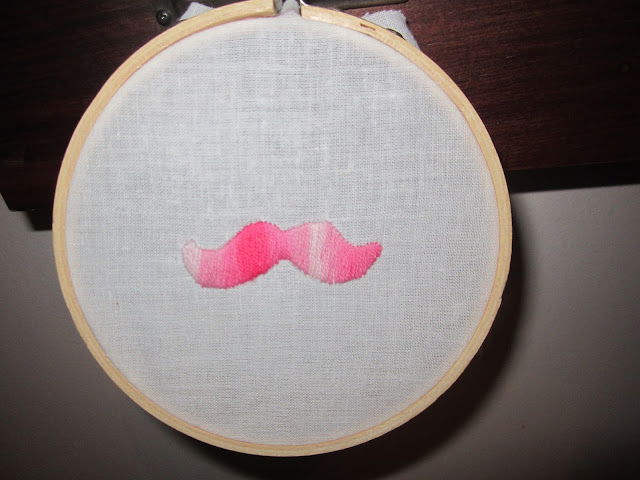
In general I am not very imaginative or original when it comes to Tim's birthday present.  For many years Tim and I had stopped giving presents to one another all together.  It wasn't until the kids got older that we decided to give presents again, mostly so the kids wouldn't question why we didn't get presents at birthdays and Christmas.  I usually grab him a shirt or two and call it a day.  This year I decided to give him a little something extra.  It isn't much, but it's home made and gave me an excuse to watch more Gilmore Girls:


Sunday, October 2, 2016

Shoe Storage in the Mud Room


Our mud room is a catastrophe!


The entire place is a complete mess, but I feel that the biggest problem we have in there is shoes.  They are spread out all over the place.  Even when I clean up everything else the shoe issue always pops up.  So I decided to find a cheap and easy way of storing all of our shoes.  I found the solution in the usual way, by googling it.

Super cheap and easy shoe organization from @Sawdust Girl.
The tutorial is at Sawdustgirl.com

This tutorial at Sawdustgirl.com looked like the right choice, easy, cheap and fast!  I chose to use cut up dowel rods instead of pre-made pegs to save money.  First I cut all of the pegs.


Then I used a sander to smooth the edges of the pegs.

Before

After
The I used my drill to make holes in the boards that were going to be the base of my shoe rack.

I chose the bit that was the closest in size to my pegs.

Then I put a drop of glue on the end of each peg and hammered them into the holes.


I then painted the racks and hung them up in our mudroom after putting away the random junk that didn't belong there.  It looks much better now!


If it were up to me I would have painted all of the shoe racks blue, but the kids wanted their racks to be different colors.  I used sample pots of paint in my paint stash to make Henry's yellow and Sofi Sue's purple.  Tim's is grey and mine is off white, just to make them all different colors.


Big improvement!