Tuesday, July 26, 2016

Hey Dad, I've Got Our Project Ready!

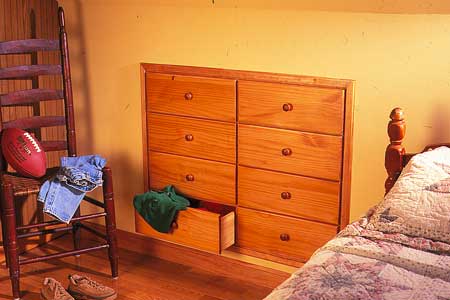
When Dad comes to visit he likes to have a project to work on.  I thought that this visit we would work on recessing my dresser into the eaves and creating two mini-closets for extra hanging space in our bedroom.
 

Knee Wall Storage
The tutorial at thisoldhouse.com seemed pretty straightforward.

Building Angled Cabinets
These angled cabinets at sawdustgirl.com would work as a closet for hanging shirts if you put a rod in there.

But I don't want my parents sleeping in a dusty work zone when they come to visit so I think these projects will have to wait for another day.

Then I thought that Dad could help with making Sofi Sue's loft bed.

A modified version of this loft from ana-white.com would work well in Sofia's room.

But Sofi Sue's room is nowhere near ready for loft construction to begin.  Then I realized that there was no way I was going to finish the living room bookshelves before Dad got here and also that this wasn't a one man job.  So, surprise Dad, we're working on building some kick-butt bookshelves together!  I've already filled knotholes and sanded them down.  Then I chiseled the extra wood off of the end of my boards.

My fancy action shot!

Much better without the jagged spikes of wood sticking out!
Then I primed the boards on one side.


And primed them again for better coverage.  I really don't want those knotholes showing through.

This time around I got smart and painted on a table to save my poor aching back!
Next I'll flip them and prime the backside twice as well.  After that I'll sand them down lightly (probably should have done that after the first layer of primer, oh well!) and stack them in a corner to wait for Dad to show up.  If you think that sounds like a lot of work, look at what my neighbors next door are doing!

That house used to have a roof, now it's going to have a second story!


Wednesday, July 20, 2016

Yay Cake!

So, I did sand my bookshelf wood and flip it and fill the knots on the bottom.  But I also made cake!


We also ate our first summer squash.  We made some zoodles out of it.  Or, I guess, it technically would be susquoodles since they weren't made out of zucchini. 


Tuesday, July 19, 2016

Filling in the Knotholes

Today I spent some time trying to smooth out the knotholes in my bookshelf wood.  I bought this wood from a man on Craigslist.  He had gotten tons of wood from a friend who was taking out shelving from the basement of a hardware store.  This wood was probably originally used in the '50s.  I got it for a good price.  Unfortunately, I stored the wood in the garage over the summer and when I brought it in to my woodworking class it had warped pretty badly.  But this was the wood I had and I needed to make it work.  I cut each board between two to three times along the length wherever it was not straight, and then re-glued all of the pieces together again after planing the edges.  In order to make the shelves smooth enough to look good I really needed to deal with the many knotholes, so I bought Durham's Rock Hard Water Putty.

I feel like people should buy this product just for the man on the packaging.
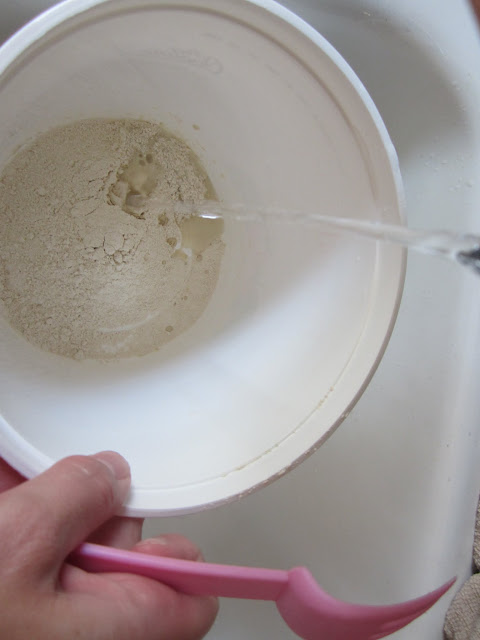
 I chose this based upon a recommendation from the paint guy at Home Depot.  It is a powder that you need to mix with water.  I poured the powder into a cheese bucket from Judi:


Then I poured in water a little at a time and stirred it up with a plastic fork:


The consistency seemed ok, so I got to work.  This is how the knotholes looked before putty:


And this is how they looked after:


It took about forty-five minutes to make the putty and fill in the holes on the top of all my boards.


Hopefully tomorrow I will have enough time to sand these down and fill the holes on the bottom sides.  Or the kids and I may just make a cake instead; I've got a pretty big craving for cake.  We'll see!

Monday, July 18, 2016

Baby Steps

Today I numbered both ends of each individual shelf for the bookcases.  They were already numbered along the flat sides, but I plan on priming them and need to be able to identify which was which when the time comes to put them together.


Then I laid them all out on the floor in preparation for filling the knotholes.


That's as far as I got today.  It's strange how life and laziness get in the way of progress!

Thursday, July 14, 2016

Summer Squash Take Over the World!

I'm not doing one lick of work this week.  We're on staycation.  But, I did spend a nice evening in the garden.  My Casserta summer squash have officially taken over their raised bed, which is too bad because I had two types of flower successfully growing in there, along with spinach.


But look at this big fella!


How do you know when you are supposed to pick them?  It is not quite a foot long, but it is getting fat and is already resting on the ground.  Henry made a happy discovery today, the bed of weeds where I had tomatoes last year and had planted two types of tomatoes this year:


actually had a bunch of tomato plants hiding in there!


These are the Chadwick Cherries I had planted last year.  I planted them this year also, but these tomato plants are all over the bed, not just in the little line I planted this spring.  So now I know that I don't have to plant any more of these, they just reseeded themselves nicely without my help.  I'm still hoping that the Hungarian Heart tomatoes appear now that I've cut back some of the weeds.  I left a couple of plants that I'm unsure of, maybe they'll turn out to be my new tomatoes!

A slightly neater and less weedy bed of tomatoes

And look at my cute blackberries!


I don't have to do any work this week, my plants are doing the work for me!  I feel accomplished as if I had done it myself.  Yay gardening!
Friday, July 8, 2016

Awesome Bookshelves, Slow Going.

These bookshelves are going to take me the next ten years to finish!  I've already been working on them for months as I made my super professional plans for how they are going to look and what size the shelves needed to be:


And then I cut the wood and used a dado saw to make the grooves for each shelf to sit in.  I didn't want the option of moving shelves later, I want these shelves to be completely built in and solid.  Now I still need to:

  •  use a chisel (which is lost) to clean up the ends of the boards
  • fill the knotholes with wood putty
  • prime the boards
  • glue and nail the shelves together
  • paint the shelves
  • attach the shelving units to one another and to the wall
I've basically created seven individual shelving units that will then be attached to one another to make one large wall-spanning bookshelf.  With all of this work to do I'm sure you're eager to see how busy I was today, how many bullet points did I knock off of my list?


Impressive, huh?  Yup, that's right, all I was able to do today was stack the shelves into their seven separate piles.  My next step?  Find the chisel.  I know, this is riveting stuff.  Come back tomorrow to see, was the chisel found?  Did I go above and beyond and make a trip to the hardware store to buy wood putty?  I know you'll have a hard time sleeping tonight waiting to see what happens next!

Thursday, July 7, 2016

Finally, Starting the Bookshelves!

We just finished having the last get-together that we are hosting at our house this summer.  So now I am free to mess the house up as much as I please without having to clean it up again for a month!  Break out the wood, nails and paint; I'm making bookshelves!  I've already designed the shelves and cut the wood in my community college woodworking class last spring.  The boards have been sitting in my garage ever since waiting for me to fix and paint the wall that they will be resting against.  I decided to move the boards inside so that I am more likely to work on the project.  This necessitated condensing the living and dining rooms into the same room again. 


Then I swept the dust, vinyl floor shavings and spiders off of the boards and carried them inside.  I know that at least one spider stowed away on a board and is now living somewhere in our house.  Now I'm going to go research nail guns and air compressors.  Yay, new tools!