Showing posts with label built in bookshelves. Show all posts

Thursday, October 6, 2016

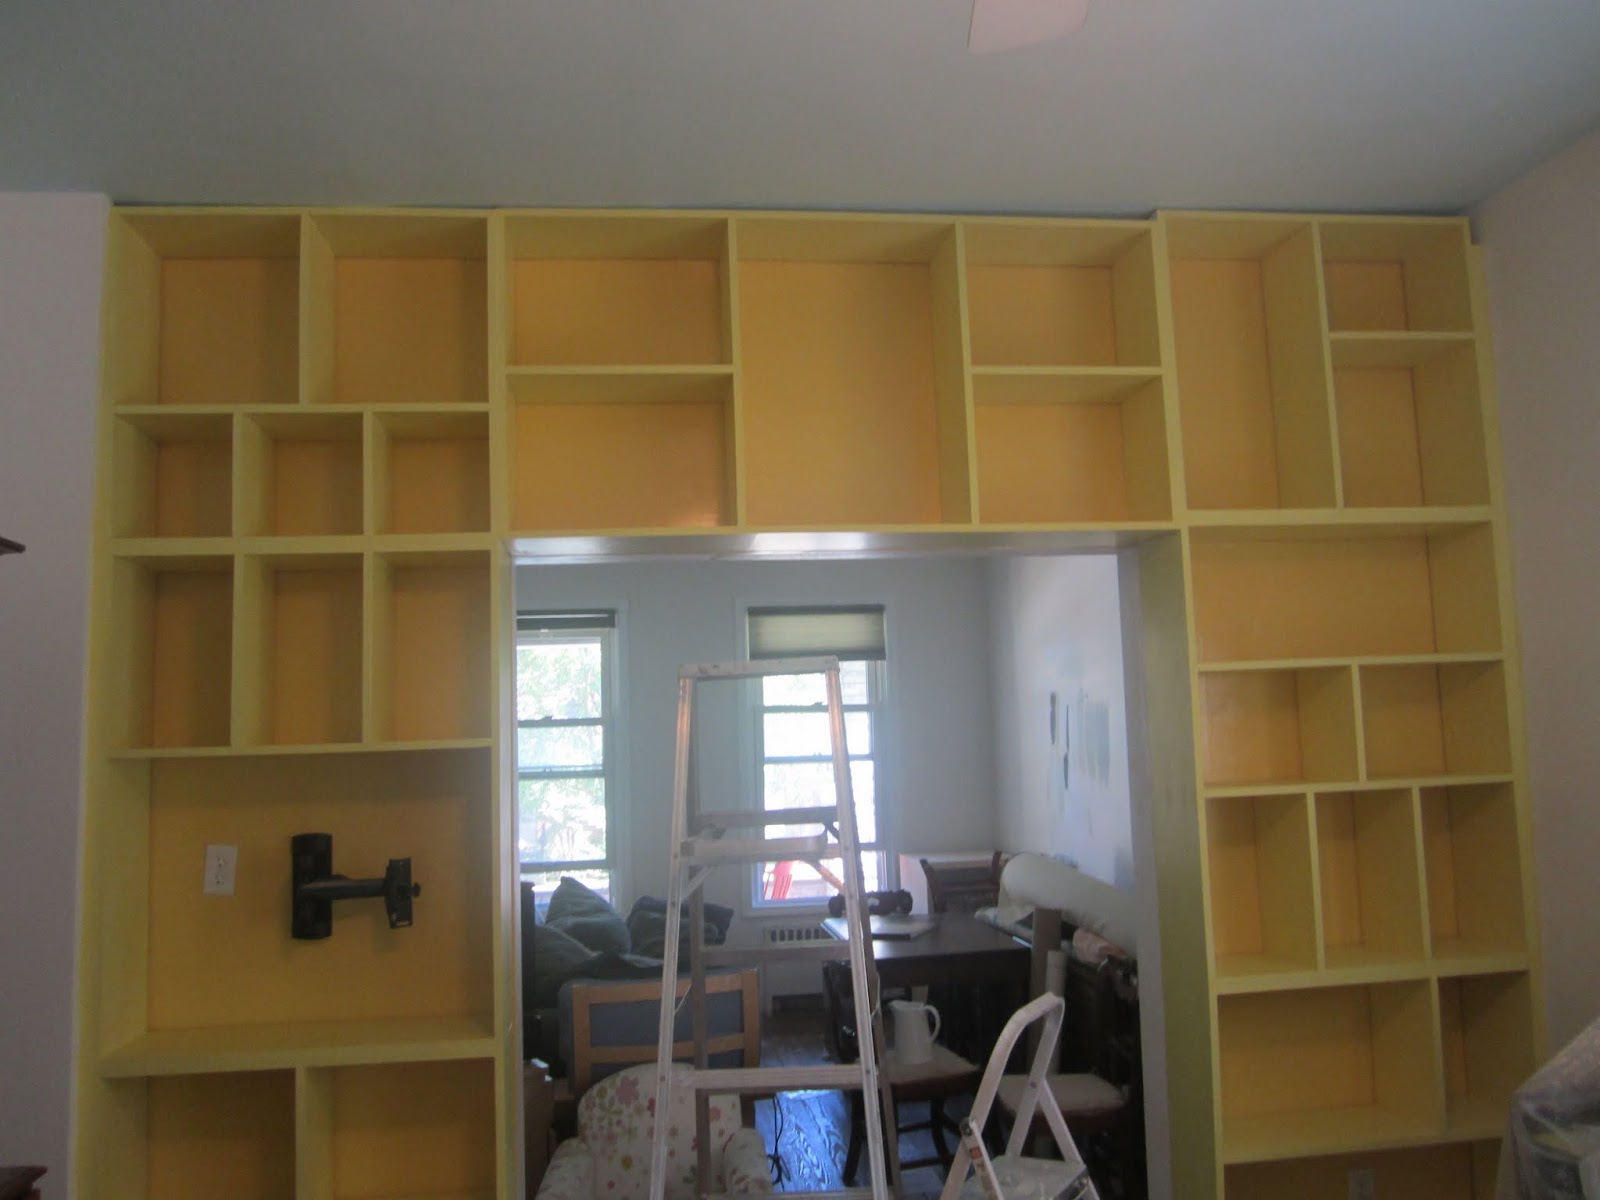
Completed Bookshelves!

A bit messy, I'll work on it!

So the bookshelves are done!  I spent the afternoon yesterday carrying boxes up from the basement and unpacking books; some of which I haven't seen in about seven and a half years!  I was hoping to have some space to display a couple of knickknacks and have the books artfully arranged.  But there isn't any room!  We still have a couple of shelves that are not stuffed full, and there is even one shelf that is completely empty!  See that one, up in the right hand corner?  Yup, that's the space I have to display cute things.  I guess that's not what my house is going to be.  The house is just not big enough for cute.  Most of the things I've worked on for the house so far have been utilitarian.  Fixing things that need to be fixed, creating storage.  With a small house I think it's a good idea to make everything useful, and then if it is also attractive that's a bonus!  Even though there isn't any space for kitschy thingamajigs, I still think the bookshelves look killer.  And, now we have books!

See the entire process:

Too Many Yellows!
Filling the Gap
Filling the Gap, Part 2
Now I Can Paint! Oh Wait, Maybe Not.
Scary Yellow Primer
A Yellow Paint That Doesn't Blind Me!
Finally, Starting the Bookshelves!
Awesome Bookshelves, Slow Going.
Baby Steps
Filling in the Knotholes
Hey Dad, I've Got Our Project Ready!
So I've Been a Little Lazy
Getting Close to Being Done!
Filling More Gaps
I'm in a Yellow State of Mind

Did I really write 16 posts on one little project!  You bet!  And it was evidently an exciting one, look at all those exclamation points!

Tuesday, September 20, 2016

I'm in a Yellow State of Mind!

After the first coat of yellow primer my bookshelves are looking decidedly cheerful!


As you can see, the yellow primer is much lighter than the yellow of the wall.  Eventually all of the bookshelves will be that same darker yellow.  Here's a close up to see the difference in color better:


After painting the primer on the shelves it was much easier to see all of the areas where I either forgot to putty, or where the putty job was simply sub par. 

Giant gap where my shelf meets its dado cut.

Same spot filled with putty.
I've started actually painting now, I'll give you an update on how well my attempt to smooth out the shelves works once I slap a coat of extra shiny paint on top of it!

Friday, August 26, 2016

Filling More Gaps

Living in an old house is not as fun as I thought it would be when I was younger.  I used to be obsessed with all things old; built in's, original wood floors, molding, and those little doors that used to lead from the porch to the ice box.  Now, I just want straight walls.  But there's no use crying about what you can't have, instead you just have to deal with what you've got.  And I've got majorly wonky walls.  Between my built in bookshelves and the walls on either side there are extremely uneven gaps that range from nearly two inches in some spots to a quarter of an inch in others.  I briefly considered using my original filling the gap method, but that would require too much time.  Instead I decided to fill the gap with pre-primed 1X2's.  I measured the gap in several spots and transferred those measurements onto my wood.


Then I used my belt sander to try and sand down to my line.


It took FOREVER!  So then I cut part with my miter saw, but that only would cut about twelve inches into my 1X2.  Then I took a hacksaw and went at what was left.


At least two hours after starting I had the wood for the left gap ready.  And I was dreading the next day when I would have to do it all over again on the right side.  But, the next day I realized I was being a dope.  This doesn't have to be filled in with one continuous piece of wood.  So I cut my 1X2 into twelve inch sections, marked the angels I needed to cut and used my miter saw to get it all done in less than half the time it had taken me the day before..  I'll need a little extra putty to cover up where the wood meets, but I plan on using a ton anyway, so what's a little more?  I also bought a couple of wooden shims to fill in the much narrower areas.

Then, today, I had to actually attach all of this wood.  I bought a small container of liquid nails and quickly realized that I didn't have the right angle to smear it onto the sides of the bookshelf.  So, I got creative and gooped the glue onto the handle of a fan and spread it with that.

Thanks Shakespeare!

I maneuvered the wood into place and shot a couple of brads to hold it in place.


It doesn't look perfect, but hopefully the putty will smooth everything out and hide the imperfections. 

Here's how it looked before:


And here's how it looks now:


I'll let you know how the puttying goes!

Saturday, August 20, 2016

Getting Close to Being Done!


Look at these beautiful shelves!  Look at them!

Mom and Dad were in town and stayed with us this past week.  Dad and I spent all week working on the living room bookshelves.  Amazingly, we got them up and secured to the walls despite realizing that I made two of the seven sections incorrectly and that my room slants down towards the middle of the house.  This causes the right side of the bookshelf to be much higher than the left because the floor is higher on that side of the room.  Oh, also, my walls in the living room are plaster and lathe and therefore not flat.  At all.

So here's what we did to make it work.  First, the shelves didn't fit into the dados I had made because the boards were still slightly warped and I had primed them, making the boards slightly too thick to fit.  We solved this by sanding the ends of the boards.  After that it was pretty simple to glue and nail the shelves together using some pipe clamps to make them nice and tight.


Then we had to screw them to one another so that the shelves would work together as one unit.

Action shot of Dad and me.
We ended up having to cut of an inch or so of the bottom of the right side bookshelf to compensate for the slanted floor.


In order to add the bookshelf over the door we had to hold it in place with some boards screwed into the sides of the left and right bookshelves so it wouldn't fall on our heads while we connected them all together.


Boy, this post makes the whole thing look so quick and easy!  There are still a lot of things that need to be done, including filling in all the nail and screw holes, filling in the gaps between the shelves and the walls on both sides, priming, painting and covering the wonky top with crown molding.  But I'm so happy to have gotten this far, which I never would have done without my dad's help.  Thanks Dad!

Get The Tools (affiliate links)
These are the tools I used to create this project:

Porter Cable Air Compressor I chose this because Dad recommended the company and it was reasonably priced.  Plus, it's cute!

Wen 18 Gauge 2" Brad Nailer This one got good reviews and was super cheap, my kind of tool!


If you want to see the entire project so far, here are some of my other posts on building these shelves:

Finally Starting the Bookshelves

Awesome Bookshelves, Slow Going

Baby Steps

Filling in the Knotholes

Hey Dad, I've Got Our Project Ready!

So I've Been a Little Lazy


Tuesday, August 2, 2016

So I've Been a Little Lazy

I haven't made much progress on my bookshelves since my last post.  I did spend four days priming each side of the boards twice.


After the first day of priming the boards by sitting on the ground next to them my back was killing me (I've become my father).  So the second day of priming I wised up and set up my folding table.


This was much less uncomfortable on my back.  Now I'm working on sanding both sides and putting them back into piles based on their order in the bookshelf. 


This way, when Dad shows up, we'll be all ready to glue and nail together the shelves.  Then I plan on giving them a final coat of primer, this time the yellow tinted primer.  Then we'll see if I have time to paint them before attaching them to the wall, or if I'll have to paint them after they are attached to the wall.  Maybe, while I'm waiting for Dad to come, I might even work a little on the counter top I started months ago for the laundry room.  I started the laundry room project way back in April, but after finishing the floors I haven't made much progress.  It would be nice to move along in a project, any project!  I keep on starting ones that are interrupted by new projects and none ever get completed!

Tuesday, July 19, 2016

Filling in the Knotholes

Today I spent some time trying to smooth out the knotholes in my bookshelf wood.  I bought this wood from a man on Craigslist.  He had gotten tons of wood from a friend who was taking out shelving from the basement of a hardware store.  This wood was probably originally used in the '50s.  I got it for a good price.  Unfortunately, I stored the wood in the garage over the summer and when I brought it in to my woodworking class it had warped pretty badly.  But this was the wood I had and I needed to make it work.  I cut each board between two to three times along the length wherever it was not straight, and then re-glued all of the pieces together again after planing the edges.  In order to make the shelves smooth enough to look good I really needed to deal with the many knotholes, so I bought Durham's Rock Hard Water Putty.

I feel like people should buy this product just for the man on the packaging.
 I chose this based upon a recommendation from the paint guy at Home Depot.  It is a powder that you need to mix with water.  I poured the powder into a cheese bucket from Judi:


Then I poured in water a little at a time and stirred it up with a plastic fork:


The consistency seemed ok, so I got to work.  This is how the knotholes looked before putty:


And this is how they looked after:


It took about forty-five minutes to make the putty and fill in the holes on the top of all my boards.


Hopefully tomorrow I will have enough time to sand these down and fill the holes on the bottom sides.  Or the kids and I may just make a cake instead; I've got a pretty big craving for cake.  We'll see!